Written by Patrick Balfe
Booking the flight is the fun part. Then comes the bit where you realize you have no idea whether your phone will work when you land, whether your hay fever tablets are legal, or why everyone keeps telling you to bring cash.
Here’s the good news: Japan is one of the easiest countries in the world to travel around once you’re actually in it. The friction is almost all front-loaded — a handful of small, boring admin jobs that take 10 minutes at your kitchen table or could cost you hours after landing if you skip them.
So here’s our Japan travel checklist — 10 things to do before traveling to Japan, roughly in the order you should think about them. Tick these off and you’ll dodge most of the classic first-timer mistakes.
Pro tip: Sorting out an eSIM before you depart is one of the biggest points on this list and one that will make your arrival in Japan a whole lot easier. Saily is a company we’ve used and tested a bunch of times and one we recommend for a trip to Japan.
1. Check your passport and visa situation

Dig the passport out of the drawer now, not the night before. Check the expiry date, and check your airline’s own validity requirements while you’re at it — carriers sometimes apply stricter rules than the destination does.
On visas, Japan has visa exemption arrangements with 74 countries and regions. If you’re traveling on a British, American, Australian, or Canadian passport — or most European ones — you can turn up for tourism without a visa. Most nationalities on the list get 90 days on arrival, though Indonesia and Thailand get 15 days, and Brunei and Qatar get 30.
If your country isn’t on that list, start early — Japan’s eVISA system is straightforward enough, but it isn’t instant.
Important: Visa exemption covers tourism and business trips, not paid work. Check the Ministry of Foreign Affairs list for your own nationality rather than taking a forum post’s word for it.
2. Fill in Visit Japan Web

Visit Japan Web is the Japanese government’s online arrival system, run by the Digital Agency. You enter your passport details, flight, and where you’re staying, and it generates a single 2D code that covers both immigration and customs.
It’s a website, not an app — ignore anything in your app store claiming otherwise. It takes a few minutes to fill in, and it turns arrival into a scan-and-go affair instead of scribbling on paper forms with a tiny pencil mid-flight. Our guide to arriving in Japan covers the rest of the landing process.
From November 1, 2026, it also handles the departure side of the new tax-free shopping refund system, so it’s worth having set up either way.
Pro tip: Do this at home, on your home Wi-Fi, days before you fly. Doing it in the immigration hall on airport Wi-Fi with 300 other people having the same idea is even less fun than it sounds — which brings us neatly to the next one.
3. Sort your phone data before you land

You will use your phone in Japan more than you expect. Google Maps for the subway, translation apps pointed at menus, QR codes on restaurant tables, train times, and the Visit Japan Web code you just set up. Landing with no connection is the single most avoidable way to start a trip badly.
Roaming with your home carrier works, but it’s usually the priciest option going. Pocket Wi-Fi is fine if you’re traveling as a group, though it’s another thing to charge, carry, and hand back. For most people, an eSIM is the easy answer — a SIM you download onto your phone instead of fiddling with a physical card and a paperclip.
We’ve tested a pile of them for our full Japan eSIM comparison, and Saily is one we happily recommend for a Japan trip. It comes from Nord Security, the company behind NordVPN and checks a lot of boxes for Japan travel eSIMs from price and installation to speed and performance. Plans also come with a few extras thrown in — a virtual location feature, an ad blocker, web protection, and 24/7 chat support.
Check your device is eSIM compatible
Do this first, because everything else depends on it. Most phones from the last five years or so handle eSIMs, and recent iPhones don’t even have a SIM tray anymore. Cheaper Android models and older handsets often don’t.
Dial *#06# on your phone — if an EID number comes up alongside the IMEI, you’re good. Saily also has a device compatibility checker on its site if you’d rather be certain. Check that your phone is carrier-unlocked while you’re there.
Install it before you leave home
This is the part people get wrong. Buy and install the eSIM while you still have reliable internet — installing it needs a connection, and the whole point is to have one waiting when you land.
With Saily, you buy the plan, download the app, install the eSIM, and switch on data roaming for it. That’s the setup done, at home, before you’ve even packed.
Let it activate itself
Here’s the bit that saves the fumbling: Saily eSIMs activate automatically. Your plan doesn’t start ticking when you buy it — it starts when you actually arrive and your phone connects to a local network in Japan. There’s no QR code to scan one-handed while wheeling a suitcase, and no clock running down while you’re still at home.
4. Get travel insurance
Japan is a famously safe country, which lulls people into skipping this. But safe doesn’t mean cheap when something goes wrong. There’s no reciprocal healthcare arrangement for tourists, so if you end up in a hospital, you’re paying the bill — often up front, in cash or on a card, before you leave the building.
Buy it when you book the flights rather than the week you fly, so cancellation cover actually covers something. And read the activities list properly: skiing in Hakuba, hiking Mount Fuji, and scooter rental on the islands are all the sort of thing budget policies can exclude.
Our guide to travel and health insurance for Japan goes through what to look for.
5. Work out your Shinkansen tickets and check the luggage rules

If you’re only doing Tokyo, skip this. If you’re doing Tokyo and Kyoto, or anything more ambitious, it’s worth 20 minutes with a calculator before you leave.
The Japan Rail Pass is the famous option, and it’s brilliant value on the right itinerary and a waste of money on the wrong one. Bought online through the official website, an ordinary 7-day pass is ¥50,000, with 14-day and 21-day passes at ¥80,000 and ¥100,000.
Pro tip: The pass doesn’t cover Nozomi and Mizuho trains — the fast ones — without buying a supplementary ticket. Factor that in before you assume the pass is the cheaper route. Our guide to choosing a JR pass and the Shinkansen fare calculator will do the math for you.
Either way, book seats in advance if you’re traveling during Golden Week, Obon, or New Year, when the entire country is on the move at once. For everything else, our Shinkansen guide has the details.

Then there’s the luggage. On the Tōkaidō, Sanyō, Kyūshū, and Nishi-Kyūshū Shinkansen lines, bags with combined dimensions over 160 cm need a reserved seat in a designated oversized baggage space, booked in advance. Anything over 250 cm isn’t allowed on board at all. Our guide to the Shinkansen luggage rules breaks it down.

Pro tip: Japan’s luggage forwarding services are one of the great underrated joys of traveling here. Send the big suitcase from your Tokyo hotel to your Kyoto one for a fairly modest fee, travel with a day bag, and enjoy the extra hands for bentos and snacks. Here’s our guide to luggage delivery in Japan.
6. Set up an IC card

A prepaid IC card is how you get through ticket gates without thinking about it, and it doubles as a way to pay in convenience stores, vending machines, and plenty of restaurants. Sorting it before you fly means walking straight past the queue at the machines.
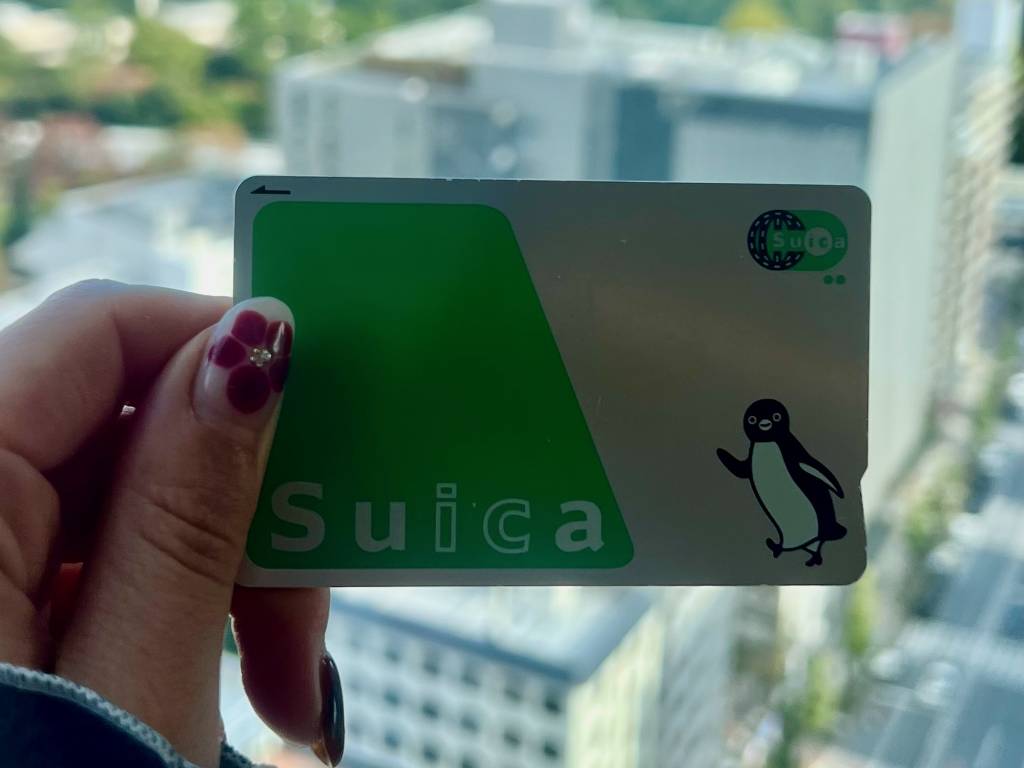
On iPhone, you can add a Suica in Apple Wallet, or use the Welcome Suica Mobile app — JR East’s tourist version, which has no deposit and stays valid for 180 days. It also links up with JR East train reservations, so you can book a Shinkansen seat and tap through the gate with the same phone.
Android is trickier. Most international Android phones lack the FeliCa chip Japanese IC cards need, so you’ll likely want a physical card instead: a Welcome Suica (valid 28 days, no deposit) or a Tourist Pasmo, both available on arrival. Our Suica card guide covers the options.
7. Bring cash and warn your bank

Japan is much more cashless than it was five years ago, and you can get through a Tokyo trip tapping a card almost everywhere. Almost. Small restaurants, shrines, market stalls, older ryokan (traditional inns), and rural bus routes often still deal in paper, and there’s no faster way to sour a great meal than discovering this at the till.
Not every Japanese ATM takes foreign cards, either. The reliable ones are the 7-Bank machines inside 7-Eleven stores and ATMs at Japan Post branches — both are everywhere and both work in English. Our guide to withdrawing cash in Japan has the details.
Before you go, tell your bank you’re traveling so it doesn’t freeze your card on day one, and check what it charges for foreign transactions and ATM withdrawals. A travel-focused card with no foreign transaction fee will quietly save you a decent chunk over a two-week trip.
8. Check your medication is legal

This is the one that catches people out, and the consequences are far worse than a fine. A number of medications sold over the counter at home are prohibited in Japan, and having a valid prescription from your own doctor doesn’t change that. The U.S. Embassy is blunt about it — bring one and you risk arrest and detention.
Some common cold and allergy remedies and certain ADHD medications are among the things to check carefully. Don’t assume, and don’t rely on a blog post — including this one. The definitive answer comes from Japan’s Ministry of Health, Labour and Welfare, and you can email them with your medication’s active ingredients, name, dosage, and quantity.
For quantities, you can generally bring around a month’s supply of prescription medicine for personal use without extra paperwork. Beyond that, you’ll need a Yunyū Kakunin-sho — an import certificate, formerly known as a Yakkan Shōmei.
The Embassy of Japan recommends applying at least two weeks before you travel, and approval can take several weeks — so treat two weeks as the bare minimum, not the target.
Pro tip: Whatever you’re bringing, pack it in its original labeled packaging and carry a copy of your prescription plus a short letter from your doctor explaining what it’s for. It costs you nothing and makes any conversation at customs a very short one.
9. Book the things that sell out

Japan’s headline attractions are not walk-up affairs, and turning up hopefully at the door is how you end up eating a disappointing sandwich in a car park.
The Ghibli Museum is the strictest of the lot — admission is by advance reservation only, tickets are for a specific date and entry time, and there are no sales at the museum itself. Tickets are released on the 10th of each month at 10 a.m. Japan time for the following month, and popular dates go quickly.
teamLab’s digital art museums also run on timed tickets and sell out on weekends and holidays — our Planets versus Borderless comparison will help you pick one if you’re not doing both. Sumo tournament tickets, seasonal illuminations, and anything involving cherry blossoms follow the same rule — book early or miss out.
The same goes for accommodation. Rooms in Kyoto during cherry blossom season and autumn leaves season get expensive and scarce months ahead, so lock that in as soon as your dates are firm.
10. Pack for the plugs
Japan runs on 100 volts with Type A and Type B plugs — the two flat parallel pins. Most modern chargers handle it without complaint, but check anything with a heating element or a motor, like hair dryers, electric shavers, and toothbrushes, which can be sluggish or unhappy on the lower voltage.
The short version
Passport and visa checked. Visit Japan Web filled in. eSIM installed and waiting. Insurance bought. Train tickets thought about. IC card ready. Some cash and a bank that knows where you are. Medication checked. Tickets booked for the things that sell out. Bags that fit the rules.
That’s the lot — a morning’s work, spread over a few weeks, and it buys you a trip where the only thing you have to think about is which bowl of ramen to have next.
Japan travel checklist FAQs
For anyone questioning:
Do I need a Japanese phone number as a tourist?
For a normal tourist trip, no. Most travel eSIMs — Saily included — are data-only, so you get internet but no Japanese number and no SMS. That covers what people actually use their phones for here: maps, translation, and messaging apps. Where it bites is SMS verification, since some bike-share apps, ticketing sites, and delivery services want a local number and won’t accept a foreign one. If you genuinely need one, a voice-and-data provider like Mobal or Sakura Mobile is the way to go — our Japan eSIM comparison covers who offers what.
When should I install my eSIM?
Before you fly, at home. Installing an eSIM needs a working internet connection, and the whole point is having data waiting the moment you land. Buying early doesn’t waste the plan either — a Saily eSIM only starts counting down when your phone first connects to a network in Japan.
Can I keep my home number and use an eSIM at the same time?
Yes, and it’s one of the best things about an eSIM. Your existing line keeps your home number live for calls and texts while the travel eSIM handles data. Just be sure to check if there are any charges for incoming calls and texts on roaming.
Switch data roaming off for the home line and on for the eSIM, and you won’t come back to a surprise bill.
Do I need a VPN in Japan?
No. Japan doesn’t censor the internet, and VPNs are perfectly legal here. The two real reasons to use one are securing your traffic on public cafe and station Wi-Fi, and watching your home streaming libraries while you’re away. Saily bundles some of that already — web protection, an ad blocker, and a virtual location feature — so check what your plan includes before paying for a separate service.
While we do our best to ensure it’s correct, information is subject to change. This post is sponsored by Saily. As always, opinions and recommendations are our own.